Field repair strategies for tiny RF connectors when replacements aren't handy
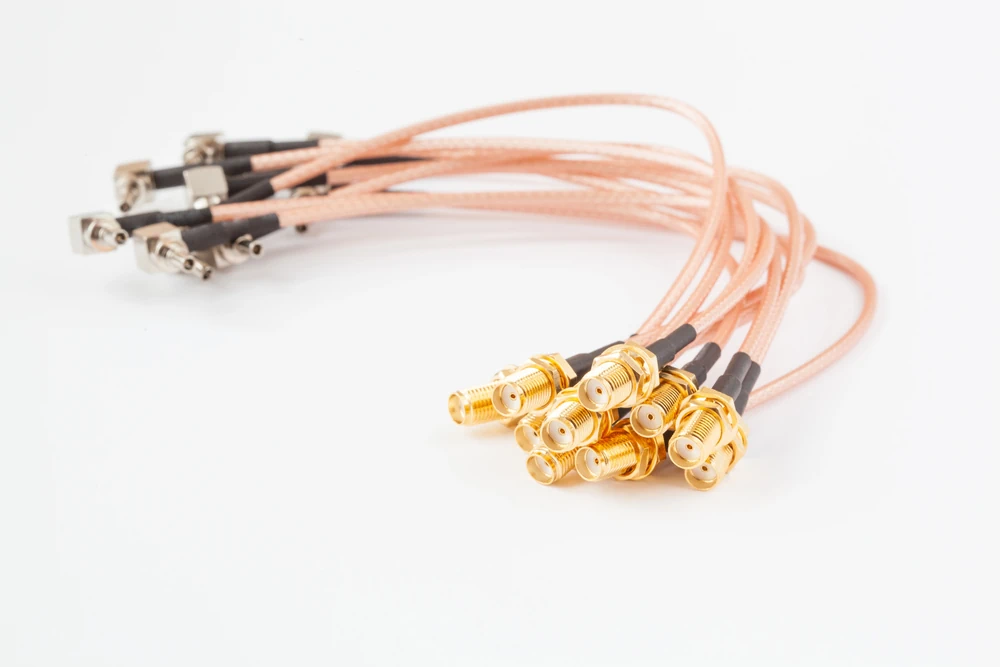
You're crouched behind a rack, flashlight in your teeth, and the U.FL connector that just popped off your antenna board is staring at you like it owes you money. No spares in the bag. Nearest supplier is two days out. Sound familiar? If you've spent any real time with miniature RF gear, you already know this scene by heart.
This piece is for the people who live with MMCX, MCX, U.FL/IPEX/MHF, SMA, SMB and SMP on a daily basis, techs, hobbyists, field engineers, whoever's stuck holding a broken connector with a deadline breathing down their neck. We're not talking about factory-grade rebuilds here. We're talking triage. Getting something working well enough to finish the job, get the data you need, or limp back to a bench where proper tools live.
Look before you touch
First rule of field repair: resist the urge to start poking immediately. Grab a magnifier or a headlamp and actually look at the thing.
Check for a bent centre pin, a crushed outer shell, a missing retention clip, frayed braid poking out where it shouldn't, a stripped thread, or just plain grime and corrosion sitting in the mating surface. Half the "failures" I've seen in the field turned out to be dirt, not damage. Contact cleaner has saved more antennas than any soldering iron ever will.
Then run a quick functional check. Continuity across the pin, a check for shorts to ground, and if you've got a way to wiggle the cable while monitoring signal, do that too. Intermittent connections love to hide until you stress them just right.
Once you know what you're dealing with, sort it into a bucket. Cosmetic grime is fixable in minutes. Mechanical misalignment, bent pins, deformed shells, broken latches, is often salvageable with patience. Cable or termination damage near the connector can sometimes be cut back and reterminated. But if the internal dielectric is crushed or the centre conductor has punched through the insulator, put the tools down. That one's going in the scrap pile, no matter how badly you want it to work.
What belongs in your field kit
You don't need a bench full of gear, but a few things earn their space in any decent kit.
Optical tools first: a good magnifier, fine tweezers, a set of tiny picks or rodding needles (sewing needles work in a pinch), a jeweler's flat screwdriver, flush cutters. For testing, a cheap continuity buzzer and multimeter cover the basics; if you can swing a compact VNA or return-loss meter, even better, but honestly most field fixes get evaluated with a "does it work now" test rather than a lab-grade sweep.
For actual repair work, carry low-temp solder, solder wick, a micro-soldering iron (a butane torch works if you're desperate and careful), a few short coax pigtails, assorted heat-shrink, Kapton tape, dielectric-safe contact cleaner, a dab of silicone or RTV, and some cyanoacrylate glue. Small crimp sleeves and a proper U.FL insertion/removal tool are worth their weight when you're dealing with those particular connectors, since forcing them by hand tends to end badly.
And yes, mind your ESD basics. A wrist strap is nice. In the field you often just settle for touching a grounded chassis before you handle anything sensitive. Not perfect, but it's something.
Connector by connector
U.FL, IPEX and MHF are the fussiest of the bunch, tiny, PCB-mounted, and about as forgiving as a cat that doesn't like you. Popped connectors and crushed housings are common. A gentle straightening with a needle under magnification can save a bent pin, and the correct re-seating tool makes a world of difference over fingernails. If the PCB-side connector itself is toast, a short pigtail soldered directly to the pads can keep you limping along. Just remember these mate a limited number of times before the retention degrades for good, so treat any field fix as strictly temporary.
MMCX and MCX are push-on designs, which means their failure mode is usually a worn latch or a shell that's gone slightly oval from being yanked sideways. Realigning the shell with tweezers works surprisingly often. A dab of RTV around the collar can hold things together until a proper replacement shows up, but don't compress the centre conductor while you're at it, that's how you turn a mechanical problem into an impedance problem.
SMA is the tank of this group, threaded and generally robust, but cross-threading and stripped threads still happen. A careful re-thread by hand, PTFE tape as a shim for a slightly damaged thread, and a straightened pin will usually get you through. Just don't force it. Mismating SMA variants (there are more of them than people expect) will wreck both halves faster than you can say "torque wrench."
SMB and SMP are snap-fit and famously sensitive to dimensional changes. A broken snap or damaged retention lip can sometimes be held with a tiny mechanical clip or an adhesive sling, but treat SMP especially gently since its performance craters with even minor shell deformation.
And a blanket warning that applies everywhere: if two connectors look alike but don't want to mate smoothly, stop. Forcing incompatible interfaces is how you end up needing two replacements instead of one.
Techniques worth knowing
Cleaning comes first, always. Contact cleaner, a blast of clean air, then inspect again before touching anything mechanical.
Straightening a bent pin wants patience, not force. Support the base, nudge gently, and never let a tool nick the dielectric around it - that's a much harder problem to fix than a bent pin ever was!
Re-shaping a shell benefits from a snug bit of tubing or a small punch to bring roundness back without crushing it further. Re-crimping coax is sometimes viable if the damage is minor; otherwise cut back and re-terminate, or splice in a pigtail if you just need continuity and can tolerate some added loss.
Micro-soldering in the field means low heat, minimal flux, quick dabs, and constant awareness that plastic housings melt a lot faster than you'd like. Pre-tin what you can before you're under time pressure.
For mechanical retention, heat-shrink over the joint, Kapton with a touch of CA glue, or a small silicone blob to relieve strain all buy you time. A cable tie for strain relief is unglamorous but effective.
Testing what you've done
After any repair, run continuity, check for shorts, and if you've got a known-good cable or antenna, swap it in for comparison. A rough RSSI check tells you plenty even without lab equipment.
Expect some penalty. Insertion loss creeps up, return loss gets worse, VSWR climbs. For telemetry or a quick field measurement, that's usually tolerable. For anything calibrated or high-power, it isn't, and you should know the difference before you trust the connection with something important.
Knowing when to stop
Some damage just isn't fixable with tweezers and hope. A torn PCB pad, a crushed dielectric core, a calibrated measurement path, anything tied to regulatory compliance, these are replace-it-or-shelve-it situations. Pushing a field fix past its limits risks damaging the board traces or instrument behind the connector, and that's a much more expensive mistake than waiting for a proper part.
A fast decision path
Contaminated? Clean it and retest. Bent pin but otherwise intact? Straighten carefully and retest. Shell deformed but conductor fine? Reshape or support it, then retest. Cable severed near the termination? Cut back and reterminate, or splice a pigtail. Internal dielectric crushed or PCB pad torn? Stop right there and plan for a real replacement.
Staying ahead of the next failure
A few habits prevent half these headaches before they start. Hand-tighten SMA before any torque, keep U.FL mating cycles to a minimum, and always align connectors before applying pressure, never twist blind. Carry a handful of common pigtails and spares specific to your gear. Label your cables and add strain relief wherever a connector meets a moving part, because repeat failures are almost always the same failure happening twice.
The next half hour
Diagnose first, clean second, manipulate as little as possible, add mechanical support if needed, test what you've got, then determine if it's good enough for the job at hand. Conservative fixes keep your options open. Aggressive ones tend to close them.
Where to go from here
Manufacturer mating guides and connector drawings exist for a reason, and torque specs aren't just bureaucratic filler - they reflect real tolerances that matter more than intuition. Field repairs buy time. They were never meant to replace a proper part, and treating them as permanent is how good techs end up with bad data.